How to Garden with Organic Fertilizer (with great results!)
Are you a veggie gardener looking to increase the production and abundance of your garden? Maybe you’ve read horror stories of over fertilizing your organic veggie garden and ruining your crop. Or maybe you’ve dabbled in using organic fertilizer but have never felt fully confident and sadly ended up with lack-luster results. In today’s blog, we are diving into these murky (and stinky) waters to provide you with the information you need to effectively nourish your soil to grow healthy, abundant food.
This heady topic could be a master class in itself, so we want to equip you with pertinent information to keep your garden beds productive.

Topics we’ll cover:
Before Fertilizer: Nailing the Basics
The Consequences of Over Fertilizing
Why Use Organic Fertilizer?
Soil Testing: Is It Necessary?
Nutrients in Fertilizers
Organic vs Synthetic
Liquid vs Granular
Our Recommended Liquid Fertilizer
Benefits of Slow Release Fertilizer
Home Made Fertilizer
Before Fertilizer: Nailing the Basics
We Can’t Out-Fertilize Not Nailing The Basics.
That’s why we prioritizes getting gardens set up for success before we even touch a bag or bottle of fertilizer. Here’s what this looks like:
Making sure any veggie gardens are in full sun & close to the house for easy access and maintenance
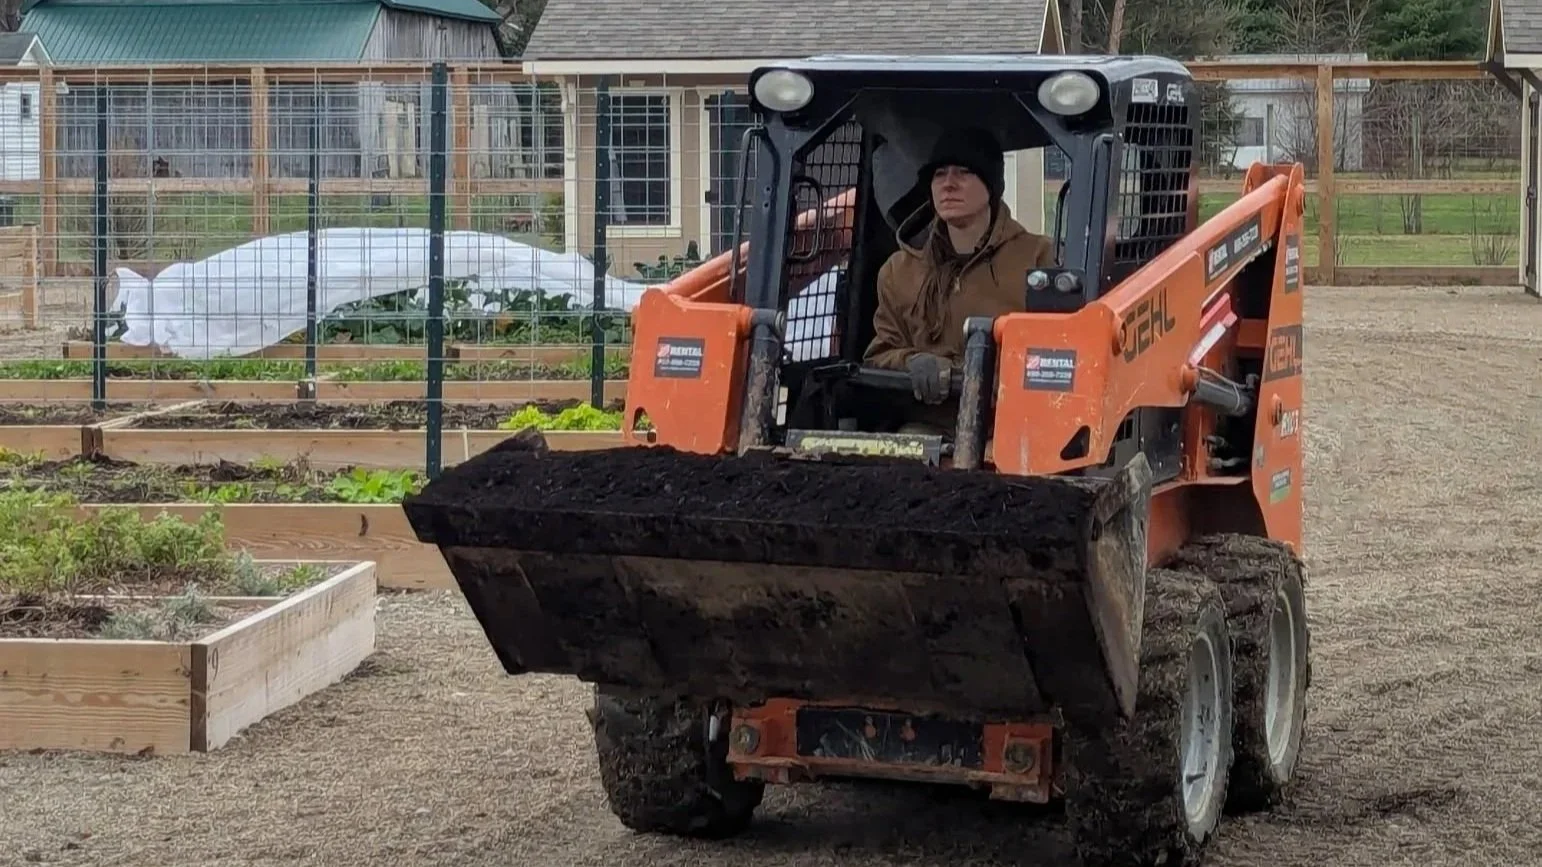
Investing in the soil— whether we’re adding in new premium blend soil for new raised garden bed builds or sheet mulching for an in-ground garden, we’re taking the time to make sure the soil is as excellent as we can get it and full of organic matter
Planting within the season— cool weather veggies (root veggies, leafy greens, many herbs, etc) are planted in April(ish), and summer crops (tomatoes, peppers, beans, etc) in May. Planting arugula in June will likely still flop, bolt, and maybe not even germinate, regardless of how much fertilizer we put into the soil!
The Consequences of Over Fertilizing
Full disclosure here: We were once spooked by fertilizer! Years ago, we were scared silly by a horror story heard in a master gardener course of a gardener who over-fertilized their garden and completely ruined their soil. Over-fertilized soil can actually take years, sometimes even decades, to undo depending on the damage.
But, this is the nice thing about the low-level & low-numbered organic fertilizers we’ll talk about: Even if you botch the math a little, you can’t do too much damage, and the nutrients your plants actually receive will help them produce more.
Why Use Organic Fertilizer?
Think of your soil like a bank: growing fruits and veggies means you’re “withdrawing” nutrients from this “bank”. So, we have a responsibility as gardeners to “deposit” nutrients back into that “bank” to keep the balance healthy.
At a minimum, many gardeners will add 1-3 inches of compost to their garden once or twice a year to add some nutrients back in. In our Columbus Foodscapes client gardens, we do this every Fall/Spring.
Fertilizer mixes, whether they’re homemade or store-bought, can help add nutrients back in too, and give any plants a great boost to grow even bigger and produce more fruit.
Soil Testing: Is It Necessary?
It’s likely you won’t know what exact nutrients your soil needs without a soil test-- if you’re chomping at the bit to check out your soil situation, we recommend grabbing a $17 soil test from The OSU Extension here. The extension can help you make sense of the results and it’s fun to explore.
However, we feel strongly that soil tests usually aren’t necessary to build great soil for the average home gardener. We’ve worked in hundreds of gardens in Central Ohio, with great success for our clients, and we’ve only had folks get a soil test in a couple situations: 1) if their soil potentially contains led, which is essential to know before growing, and 2) if they are having clear nutrient deficiency symptoms in their plants, like slow/no fruit, yellowing leaves, variegated discoloration in leaves, etc.
In almost all cases, if we’re adding compost, using raised beds/mounded beds, using gentle/slow release fertilizers, rotating/interplanting crops, and using other management techniques like using mulch, our soil should be in pretty good shape.
All said: get the soil test if you’re jazzed about the geeky science stuff, or if you are having issues in your garden. Otherwise, don’t feel the pressure, since it’s likely not necessary and most home gardens don’t need that level of precision.
Nutrients in Fertilizers

Store-bought fertilizers will have three numbers (e.g. “3-5-3”) on the front, and these indicate the quantities (percentage) of what are considered the three primary nutrients in fertilizers, in order: Nitrogen, Phosphorus, and Potassium.
Each of the nutrients have different roles in the garden:
🧪 Nitrogen: Promotes fast, leafy growth. Often the nutrient we’re focused on replacing (compost is high in nitrogen!). Too much nitrogen can cause plants to grow too quickly, though, attracting pests and sometimes causing flowers to bloom sparsely.
🧪 Phosphorus: Supports early root growth, hastens blooming.
🧪 Potassium: General health, resistance to drought and disease, and can improve quality of seeds.
So, a fertilizer that is listed as “21-0-0” is 21% nitrogen, while a fertilizer with “0-46-0” is 46% phosphorus.
If a fertilizer has one nutrient that is super high (like the above examples), it’s highly likely it’s a synthetic nutrient, and is lab-made. We tend to avoid those in our company, primarily because in raised bed gardens we are able to start with already-good soil (unlike many farms!), and prefer organic fertilizers instead that have low percentages and release more slowly over time (think “3-5-3” instead of “5-20-5”).
Other nutrients, like sulfur, calcium, magnesium, and others are considered secondary nutrients (but still very important!).
While it’s nice to know the general role of these nutrients, we compare them to measuring, say, macronutrient consumption in people. Most of us raised bed veggie gardeners don’t need to get super-specific with the exact “N-P-K” numbers as long as we are seeing success in our spaces, using slow-release organic fertilizer, and building good soil through practices like adding compost and using mulch.
Organic vs Synthetic
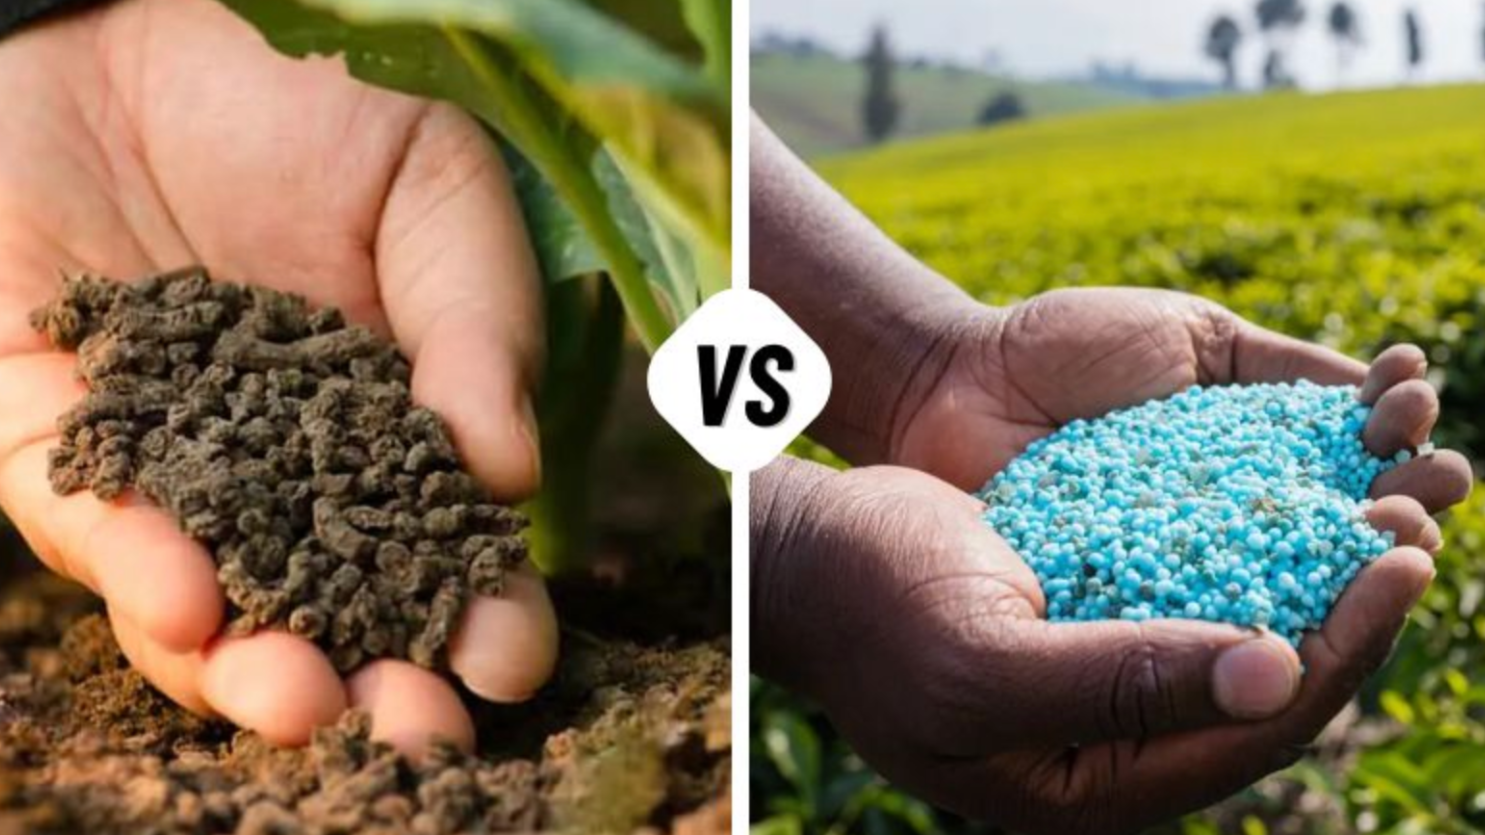
A great stock photo we found online demonstrating the difference between organic & synthetic fertilizers- we bet you can tell which one is which!
🧪 Synthetic fertilizers:
AKA inorganic fertilizers
Are generally manufactured, water-soluble
Often deliver a big boost of nutrients, very quickly; there are also slow-release versions though, too
Have a higher potential to “burn” plants and greater potential to negative environmental impacts due to runoff, but highly effective at boosting specific nutrients if applied correctly
🌱 Organic Fertilizers:
Derived from living organisms (like fish emulsion or blood meal)
Are generally slow to release nutrients, offering plants fewer nutrients at once, but over a longer period of time
Often are more expensive, pound for pound, than inorganic fertilizers
Less likely to “burn” your plants
Liquid vs Granular
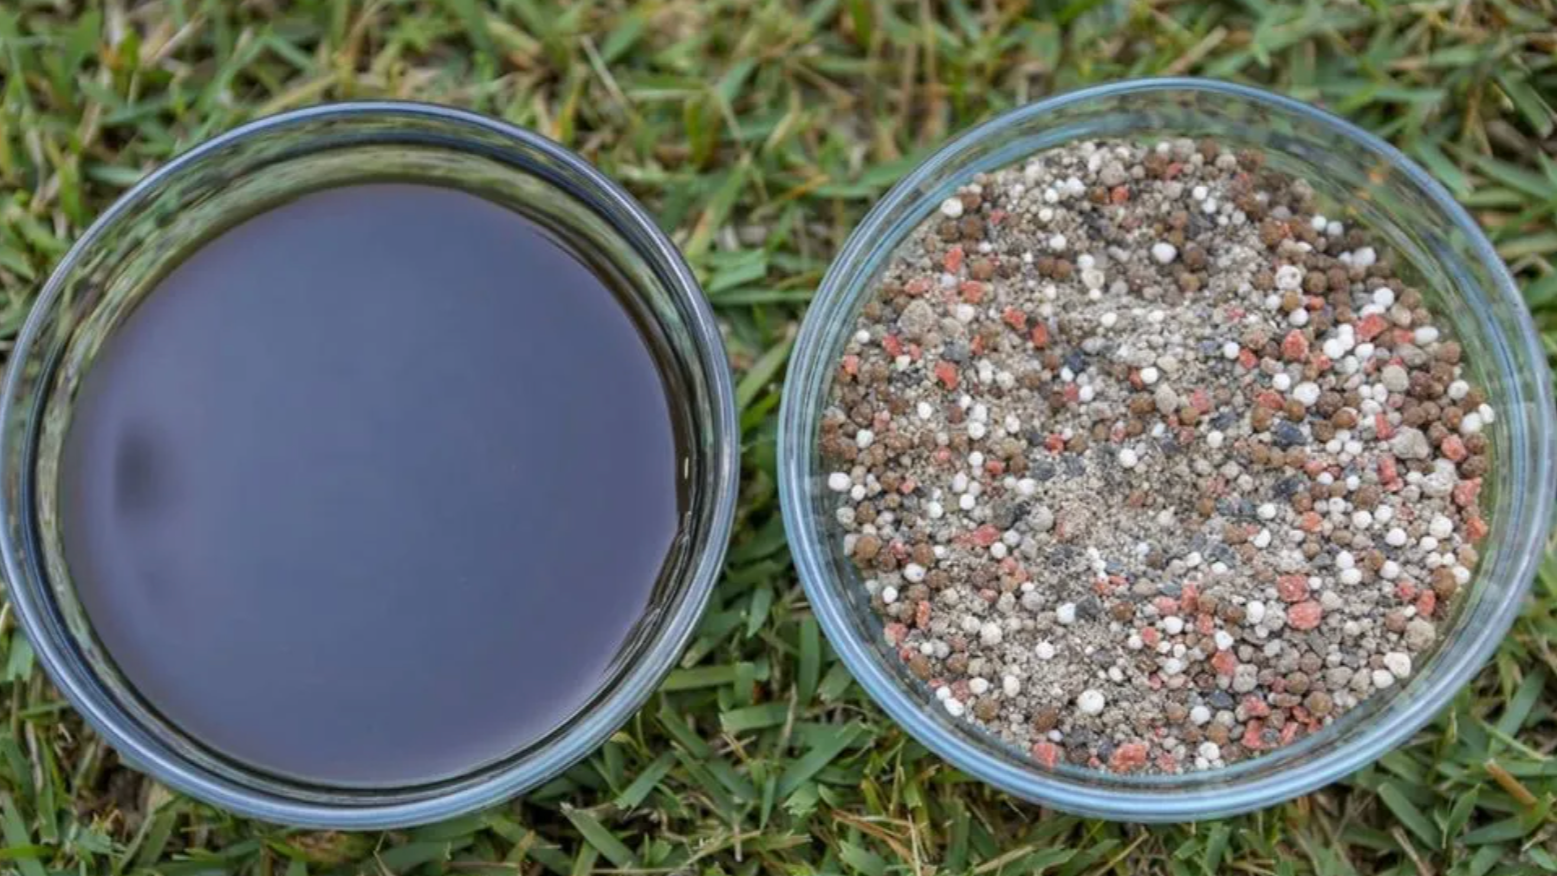
There are two main types of fertilizer compositions: Liquid and Granular.
Granular fertilizers, especially organic ones, are often designed to be more slow-release and will continue to offer nutrients weeks after application. They typically have a longer shelf-life than liquid fertilizers, and don’t require any special equipment to easily apply(we just use an old mug in our gardens to broadcast the granules!). They can be worked into the soil before planting, or applied as a “side-dressing” on the sides of plants— either way, an organic, slow-release fertilizer will offer plenty of nutrients! We use the Down To Earth Vegetable Garden 4-4-4 mix in our gardens, carefully measuring spaces and applying according to the square footage directions.
Liquid fertilizers are often diluted with water, and then used to “water” the soil; since plants take them up much more quickly, they are often applied once seedlings are already established. You’ll see some fertilizers will even advertise as a “foliar spray,” where application instructions include spraying the leaves of plants rather than the soil, where the roots are. They are also fairly easy to use, but might require some equipment like a fertilizer spray attachment nozzle for larger gardens (smaller ones can just use a watering can!). After doing our due research, we saw positive results using the Neptune Fish Fertilizer starting last year.
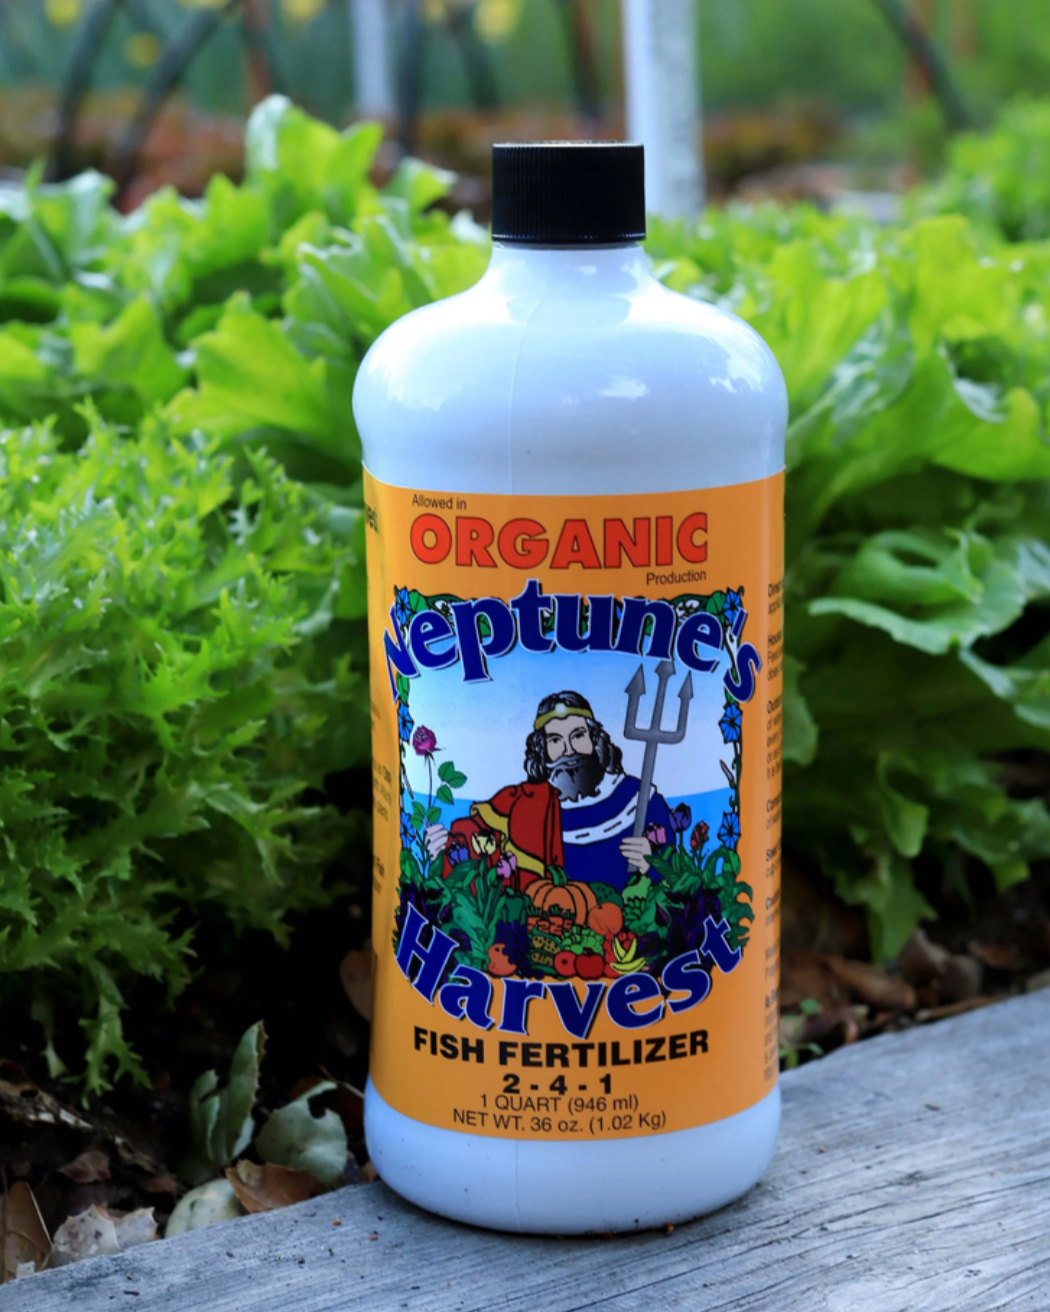
Our Recommended Liquid Fertilizer
Once the plants are a few weeks old in their new home, we add Neptune’s Harvest Liquid Fertilizer (2-4-1) to the soil, also called a “soil drench application.” While you can add this fertilizer as often as weekly, we typically fertilize every 2-4 weeks. This might be a good time to share there’s no special sponsorship here, we just went down a research rabbit hole and were intrigued by one article, and then another, that had some really promising info that this specific organic fertilizer yields excellent results.
This fertilizer application really shines a few weeks after planting because too much nitrogen can actually prevent those fruiting plants (tomatoes, peppers, etc), from actually setting fruit. They’ll get big and bushy, maybe even flower, but with little actual fruit. The Neptune fertilizer is higher in phosphorus, which helps with seed and flower production.
Benefits of Slow Release Fertilizer
A big boost of nutrients, like what nonorganic fertilizers offer us, sounds amazing in theory right? Like a big superfood smoothie or something.
Maybe, but that big boost of growth can come at a cost. When plants are hyper-fertilized, like what often happen with inorganic fertilizer methods, they put on a lot of new growth very quickly. This new growth is often extra-delicious to pests like mites, aphids, and others.
Yep: too much fertilizing can actually attract pests to your garden.
To dig in more, check out this article from SARE, where they state, “Researchers have demonstrated that high nitrogen levels in plant tissue can decrease resistance and increase susceptibility to pest attacks.”
Slow release fertilizers might work more slowly, but they come with a big benefit of fewer pests.
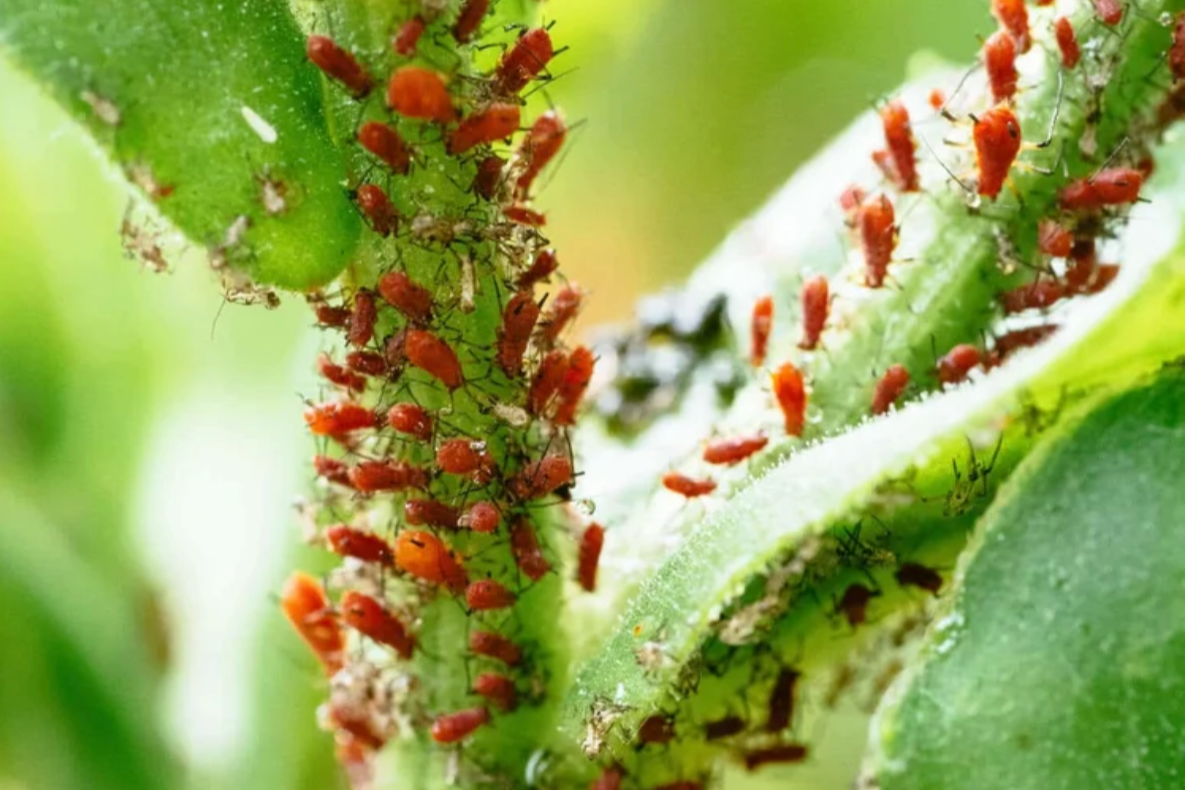
Highly concentrated fertilizers, or over-applying fertilizer, can cause a big burst of growth in your plants, attracting pests like aphids.
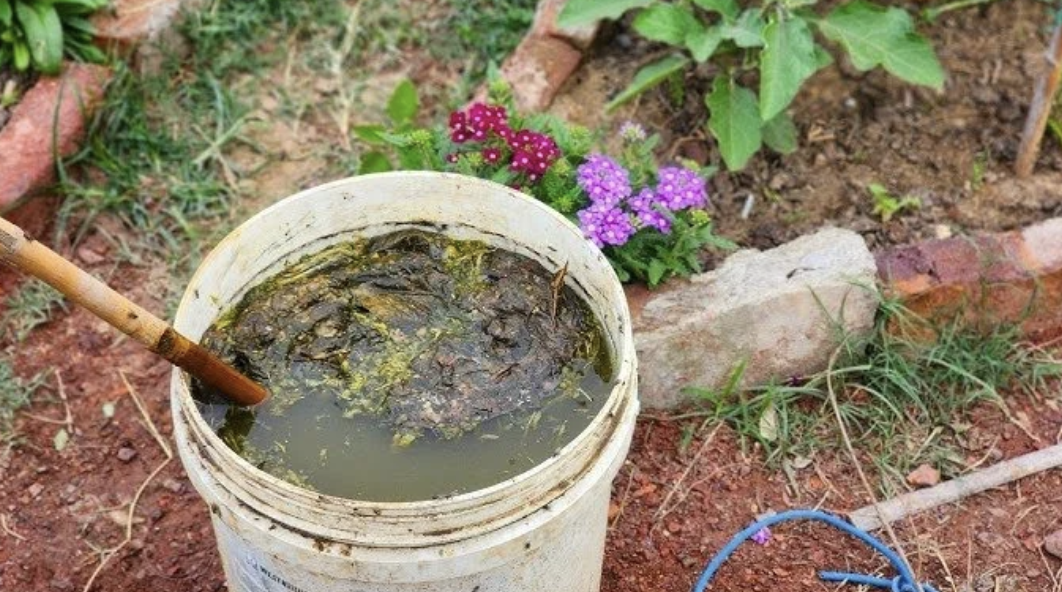
Homemade Fertilizer
Homemade fertilizer can be made a variety of ways, but the simplest is to take weeds and plants (comfrey and purple nettle are among some of the most popular), mix them in a bucket with water (plus a handful of soil and some blackstrap molasses), and let it sit for a few weeks.
Another way is to take compost, or worm castings, and make what’s commonly known as “compost tea.” The concept is the same (compost + water + a drizzle of blackstrap molasses) and can give your plants a bigger nitrogen boost.
We know a few gardeners who really swear by and love this method: it’s free, using stuff you probably already have in your yard, and really does seem to add nutrients and minerals back to the soil. What’s not to love :)
Parting Notes:
Organic fertilizing in your veggie garden does NOT have to be a scary thing! Working with organic, slow release fertilizers, which are much less likely to “burn” your plants is an efficient way to give your soil the boost it needs to produce healthy, productive food.
Still looking for more guidance? We offer 1:1 garden consultation services where we can assess your space, trouble shoot challenges, and answer burning garden questions to help you grow food in a way that fits your budget and lifestyle. Learn more about this unique service in Central, Ohio HERE.
Wishing you happy fertilizing!